Feeds:
Posts
Comments

Archive for the ‘Deer Valley Resort’ Category

DSC03199I’ve heard, though it’s not my recent personal experience, that state fair food vendors have gone wild. Forget corn dogs. These days you can sample even more than deep-fried ice cream and brownies. Deep fried-watermelon anyone? Or Thanksgiving dinner—turkey, stuffing and creamed corn fried in a ball? I wonder if there is a carnival food truck that deep-fries halloumi. Hear that fair food vendors? You could be the first! Halloumi cheese can handle the heat.
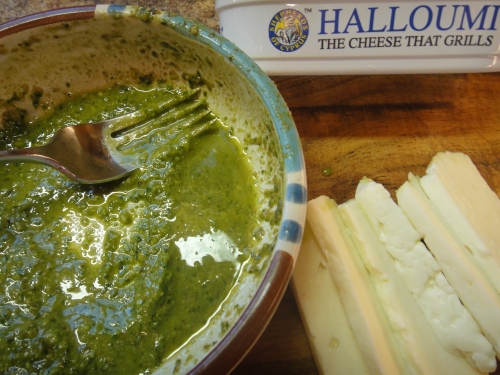
DSC03069It’s not as if the trendy cheese was just invented. Mediterranean peasants have been enjoying this firm goat and sheep milk cheese with for centuries. Worldly foodies are long in the know, I’m simply late to the party. I’ve read about halloumi and I’ve come across recipes, thinking I should try it, but it was only this summer that I finally got around to grilling halloumi.

Kalyn over at Kalyn’s Kitchen convinced me. It was her recipe for Grilled Halloumi Cheese, Mushrooms and Sweet Onion Skewers  that sent me shopping for the unusual cheese.

DSC03072I have yet to try her skewers. For my first go, I brushed halloumi with basil pesto sauce and grilled it alongside some par-boiled potatoes. Yummy!DSC03073

IMG_0780The next week I took Robbie to dinner at Deer Valley Grocery~Café. There it was on the tapas menu; halloumi, pan-seared, and served with Spanish Marcona almonds that were gooey with Slide Ridge Honey and sprinkled with fresh thyme, on top of tangy sherry “tar.” But the cheese wasn’t actually halloumi. It was local, Heber Valley artisanal Juustoleipa cheese, a Northern European version of grillable cheese, made from cow’s milk. Maybe because it comes from just over the mountain, I think the local cheese is sweeter and more creamy than imported halloumi. I found Heber Valley Juustoleipa in the same section as Greek halloumi at the market, three blocks from our house.

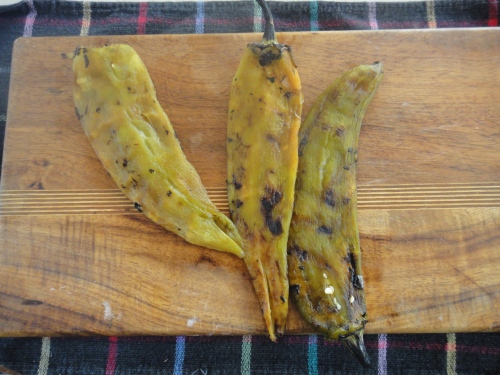
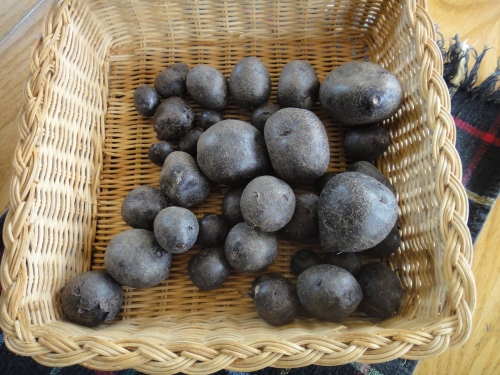
DSC03181Yukon gold potatoes came in Ranui’s CSA box and New Mexican Hatch chiles are abundant right now and became part of today’s recipe, one that shows off the cheese, a creamy contrast for the chiles and spiced potatoes.DSC03188

DSC03192Yukon Golds, Roasted Green Chiles and Heber Valley “Halloumi”

3 Hatch green chiles

1 pound Yukon Gold potatoes, peeled and cut into ½-inch chunk

2 tablespoons safflower or other “high heat” vegetable oil

1 tablespoon unsalted butter

About ¾ teaspoon Real Salt, to taste

About ¾ teaspoon New Mexican green chile powder, to taste

3 to 4 ounces halloumi or Juustoleipa cheese

Prepare the green chiles:

Roast the chiles on high heat, over an open flame on your stovetop, in your broiler, or on your grill. Cook the peppers, turning often, until they are blistered and blackened on all surfaces, about 3 to 5 minutes for each exposed surface.

Place in a closed plastic baggie or in a casserole dish with a fairly tight lid and let them cool. Cooling will create steam and help the charred skin release from the chiles.

After about 10 minutes, cut off the top of each chile, and peel away the skin. (You might want to discard most of the seeds if you prefer your chiles mild.)

Cut the chiles in strips and set aside.

Cook the potatoes: Place the potatoes in a steamer basket set in a saucepan with water under the steamer basket. Steam until the potatoes are barely tender, about 10 minutes. Pick the basket up out of the saucepan and dump the potatoes in a clean kitchen towel, so that they lose most of their moisture.DSC03190

Heat a large non-stick skillet over medium high flame. Add the oil and butter. When the butter has melted, add the potatoes and cook, tossing occasionally, until the potatoes are golden on a few sides. Sprinkle to taste with salt and the green chile powder along the way. This will take 15 to 20 minutes.

When the potatoes are golden and crispy, push them to the outer edges of the skillet. Add the green chile strips to the open area in the middle. Let them heat through, and then push them to the outside of the skillet as well.DSC03194

DSC03197Cut the halloumi (or Juustoleipa) cheese in strips about 3/8-inch thick. Place the strips in the middle of the pan and cook until lightly golden on both sides.

Serve immediately.
Makes 2 to 3 servings.DSC03199

Read Full Post »

DSC03080Purple Majesty–patriotic purple potatoes. Very American, developed in Colorado by traditional plant cross-breeding, not by genetic modification, and quite young, available commercially only since 2005, Purple Majesty potatoes have skin that is practically black in color, like the outside of a plum. DSC03085Cut them in half and the inside is a lighter purple.  When cooked and peeled, they become more indigo; sprinkle them with lemon juice and another pretty shade of violet appears.DSC03086 It is a fact that purple potatoes are super-food, loaded with antioxidants, or polyphenols, the cancer and disease preventing nutrients in red wine, blueberries and grapes.

You can find them in farmer’s markets but rarely in grocery stores. I love it that John G. plants interesting spuds at/in Ranui Gardens.DSC03087DSC03091DSC03089DSC03092

Purple Majesty Potato Salad with Blue Cheese and Toasted Hazelnuts

1 ½ pounds purple majesty or other purple potatoes

2 tablespoons mustard, preferably whole grain

2 tablespoons lemon juice

¼ teaspoon Real Salt

2 tablespoons plus 1 tablespoon extra virgin olive oil

1/8 teaspoon freshly ground black pepper

2 to 3 leeks, depending on size

½ cucumber

½ cup hazelnuts, toasted, peeled and coarsely chopped

3 tablespoons finely chopped parsley

2 ounces good-quality blue cheese, smashed

Scrub the potatoes well. Cut them in pieces a little bigger than the tip of your thumb, from the thumbnail up. You want them all to be about the same size so they cook evenly. Place them in a pot and cover with cold water, adding quite a bit of salt, about 1 teaspoon per quart. Bring to a boil and simmer until the potatoes are just tender, 10 minutes or so. Drain.

While the potatoes are cooking, make the dressing. Whisk the mustard, lemon juice and salt in a bowl. Slowly drizzle in the first 2 tablespoons of olive oil. Add the black pepper.

When the potatoes are still warm, but cool enough to handle, peel them to reveal the indigo hue. As they are peeled, put them right away into the dressing, tossing to coat. The potatoes can marinate in the dressing while your prepare everything else.

Clean the leeks and trim them. Slice the white and light green end into thin rounds, less than 1/16-inch thick.

Heat the remaining tablespoon of olive oil in a skillet. Over medium flame, cook and stir the leeks until they are a little crispy and golden on the edges.

Peel the cucumber. With a spoon, gently scrape out the seeds. Slice 1/8 to ¼-inch thick.

Stir the cooked leeks, cucumbers, hazelnuts, parsley and blue cheese into the potatoes, mixing well so the blue cheese coats everything. Taste and adjust seasoning, adding more salt and pepper if you think it needs more flavor.

Serve warm or chill for a few hours first.

Makes 3 to 4 servings.

Read Full Post »

Pesto Potatoes on the Grill

Earlier today at work, as I walked from a busy bakery to my office, I passed one of the cooks opening tubs of tofu. I notice tofu, more than I would a pot of turkey chili, mostly because it’s not on the menu everyday at Deer Valley and more so because I love tofu! Before going home, I watched the same cook arrange those triangles of tofu, hot and emerald green with pesto, on a bed of arugula. At his urging, I helped myself to the extra piece on the back line—even knowing I was going to have pesto potatoes before the sun had set behind the mountain.

Robbie mentioned pesto potatoes this morning and he says he thought about them all day. He must have thought well, because the ones he made us for dinner were perfect.

Early Rose Potatoes

He used Early Rose potatoes from our Ranui Gardens CSA box and dipped into the stash of basil pesto  tucked away in our freezer. (Every time we’ve had basil in the box we make up a batch of pesto.)

Pesto Stash in random containers

Any time you cook potatoes, if you have organic ones, by all means scrub them and leave the skin on. The Early Rose potato has a thin and smooth skin.  If you don’t know your farmer and her growing practices, ask. Potatoes make the Dirty Dozen pesticide list, so it might be best to peel them if they have been sprayed. These are so good you can eat them with your fingers.

 Pesto Potatoes

4 to 6 potatoes, sliced crosswise 1/2- to 5/8 inch thick.

Olive oil, as needed

Basil Pesto, as needed

Par-cook the potatoes in a steamer or nuke them in the microwave until they have begun to cook but are still pretty firm. (You can cook them entirely on the grill but it takes a lot longer. The par-cook step helps get dinner on the table sooner.)

Heat the grill to high if the potatoes are par-cooked, to medium high if not par-cooking them.)

Brush both sides of the potato slices with olive oil. Arrange them in a single layer on a grilling tray.  and cook until the potatoes are fork-tender and have some golden grill color, turning the potatoes to cook both sides. Brush one side of the potatoes with pesto and cook about 10 minutes more, until the pesto becomes part of the potato.

Serve immediately.

Read Full Post »

Bright green, freshly frozen and shucked, edamame is soybeans, right out of the bean pod. Perhaps you have enjoyed edamame in the shell as finger food, sprinkled with high quality finishing salt, at a sushi restaurant or at Deer Valley’s Royal Street Café. Edamame adds color (and protein) to any salad, and works well in any dish where you might normally use cold beans or green peas. Since we have sweet basil in our Ranui Gardens CSA box this week, it’s in this salad. Chiffonade/slice the basil leaves and add them at the last minute. Or feel free to skip the basil and substitute a different herb, such as chopped flat leaf parsley. This week’s green garlic is looking more mature than two weeks ago and more like the garlic we will see in a couple of weeks with its papery skin skin separating each clove. Now it is still very moist and maybe at the most flavorful of its cycle.

1 ½ cups frozen shelled edamame

¼ cup extra virgin olive oil

2 tablespoons rice wine vinegar

2 stalks green garlic, trimmed and minced

2 tablespoons fresh basil, cut in chiffonade

¼ cup grated aged cheese, like Parmesan

Bring a pot of water to a boil. Add some salt and the edamame. Cook 3 to 4 minutes, and then drain the edamame. Place in a bowl and stir in the olive oil, vinegar, garlic, basil and cheese. When everything is mixed, season to taste with salt and freshly ground pepper. Toss again and serve over Ranui lettuce mix.

Makes 4 to 6 servings.

Read Full Post »

This week’s CSA box

This recipe comes from my cookbook, Chocolate Snowball: and Other Fabulous Pastries from Deer Valley Bakery. Fresh rosemary is a must here; make these only when you have fresh rosemary on hand—like we Ranui Gardens CSA members this week. If you are questioning pastry with rosemary, you will find its strong, pungent, lemony, slightly piney and distinct flavor a delightful surprise. After all, rosemary is a member of the mint family, and we incorporate mint in desserts all the time.

Trivia: ancient Greeks and Romans used the dark grey-green needles as a culinary and medicinal herb and considered rosemary a symbol of fidelity, friendship and remembrance; brides wore garlands of it in their hair, as did Greek students during their examinations.

To impart the rosemary’s fragrance, strip the needles from the stem, chop them very finely, and steep in hot cream. When the rosemary infusion is cold, mix it into the dry ingredients. At Deer Valley we form the dough in rounds and freeze until needed.

Rosemary Oatmeal Scones

1 1/2 teaspoons finely chopped fresh rosemary

3/4 cup half-and-half cream

1 1/2 cups all-purpose flour

1/3 cup sugar

1 1/2 teaspoons salt

1 tablespoon baking powder

1 1/2 cups old-fashioned rolled oats

12 tablespoons (1 1/2 sticks) cold unsalted butter, cut in 1/2-inch pieces

3/4 cup golden raisins

2 tablespoons milk or heavy cream, optional

1 tablespoon crystal or granulated sugar

Heat the rosemary and the cream in a small saucepan over medium heat until very hot but not boiling. Refrigerate until the cream is cold, about 30 minutes.

Sift the flour, sugar, salt and baking powder into a large bowl, and stir in the rolled oats. Cut the butter into the dry ingredients, using your fingers or a pastry blender, until the mixture resembles coarse meal. With a fork, stir in the cold rosemary cream and the raisins, and mix until the dough comes together. It will be quite sticky. To form this soft dough into a round, line a 9-inch round cake pan with plastic wrap. Put the dough into the pan and fold the plastic wrap over to completely cover the dough. Form the dough into an even round disk, about 1/2 inch thick, by pushing the dough around under the plastic wrap. Refrigerate or freeze about 1 hour, or until cold enough to cut.

Preheat oven to 375˚. Line a large baking sheet with parchment paper, or coat lightly with butter or cooking spray. Cut the scone dough round into 10 pie-shaped wedges. Arrange on the prepared pan at least 1 inch apart. Brush with milk or cream, if using, and sprinkle with sugar. Bake 15 to 20 minutes or until the bottoms are light golden brown and your finger doesn’t leave an indentation when you touch the tops.

Makes 10 scones.

Read Full Post »

Tarte Aux Blettes, with roasted pear and ruby chard Moscato sauce and creme fraiche sherbet

Tarte aux Blettes, that’s the menu title, since I think most people would see Swiss chard tart on a dessert menu and pass it over for the Chocolate Snowball. I remember ordering this tart in Nice, France way back in 1986, for professional curiosity of course. After that, also a long time ago, I tried making it, likely from a recipe in the old Time-Life Food of the World series; it must have been the Cooking of Provincial France book. I didn’t like how that recipe came out—tough crust and odd mix of flavors, and the chard was probably old and bitter. Nevertheless, anytime I see another version of this Swiss chard tart, I am tempted to try again. A quick Google search shows that there are plenty of recipes out there, including translations from Boulud and Payard.

David Lebovitz, my favorite blogger, posted his rendition last year, writing about his almost fruitless search for more chard in Paris, after he’d decided he needed more to complete the recipe. Two pounds of chard for each tart is a lot, much more than one bunch, making this tart most appropriate when gardens are overflowing with chard. So, when I was asked to prepare dessert for Utah’s Slow Food gala dinner, I decided it was the perfect opportunity to perfect my own interpretation; my audience would be captive, meaning they wouldn’t choose that rich warm chocolate cake from the menu instead, because there would be no choice. And the date was mid-September, when gardens in our high altitudes are peaking; I was able to beg 22 pounds of sweet fresh-picked chard,  young and tender Blonde de Lyon chard from John at Ranui Gardens and rainbow chard with colorful stems from Daisy at Copper Moose Farm—two of our Wasatch back CSA farmers. I took David’s recipe and made it mine, with a sweet sugar cookie crust, no Parmesan cheese and fresh pears instead of apples. I served it with candied red chard stems and Moscato-poached Utah pears, both roasted to intensify their flavors, and crème fraîche sherbet.

Tarte aux Blettes

For the sugar cookie crust:

1 2/3 cups all-purpose flour

1/4 cup sugar

10 tablespoons cold unsalted butter

1 egg yolk

2 tablespoons heavy cream

For the filling:

¼ cup poire william sweet pear liqueur

1/3 cup golden raisins

2 pounds Swiss chard well washed, stems and veins removed, red and yellow stems reserved (you will end up with about 1 ½ pounds of leaves after stripping away the veins and stems)

Pinch salt

¼ cup lightly toasted pine nuts

½ teaspoon ground cinnamon

½ cup organic cane sugar

2 eggs

1 ½ Bartlett pears, peeled and sliced

1 tablespoon tapioca flour or starch

Confectioners’ sugar

Make the crust:

Stir the flour and the sugar together in a medium bowl. Dice the butter into 1/2-inch pieces. Using a pastry blender or your fingers, cut the butter into the flour until the mixture resembles a coarse meal. In a separate bowl, beat the egg yolk and the cream. Sprinkle over the dough, stirring with a fork. Mix with your hands until the dough comes together, and divide in two portions, one a tiny bit larger than the other. Gently form each portion into a flattened 4-inch ball. Wrap in plastic wrap and refrigerate at least 2 hours.

Make the filling:

Put the raisins and pear liqueur in a small saucepan and bring to a simmer. Remove from the heat and set aside until the raisins are plump with the liqueur.

chard leaves, cooked, with all the water squeezed out, enough for 9 tarts

Put the chard leaves in a saucepan or skillet with about ¼ cup of water and a pinch of salt. Cover and cook the leaves until they are completely wilted and have shrunk incredibly. Drain the leaves and immediately run them under cold water to help keep the bright green color. When they are cool, squeeze as much water as you are able from the leaves.

Chop the cooked chard and put into a bowl. Drain any liqueur from the raisins and add them to the chard. Sip the pear brandy while you continue making the tart.

Chop the pine nuts coarsely and add them to the chard, along with the cinnamon, sugar and eggs. Mix well; set aside while you roll the crust.

Roll the crust and assemble and bake the tart:

The dough it must be worked by hand first or it will be too crumbly: Cut each portion of the cold dough into 1/2 cup portions and smear the pieces quickly with the palm of your hand–the motion is similar to kneading but more gentle.

Brush melted butter on the sides and bottom of a 9-inch fluted tart pan with a removable bottom, or spray with cooking spray. On a lightly floured surface, roll the larger portion of dough into a 12-inch circle, 1/8 to 1/4-inch thick. Use short coaxing strokes of the rolling pin and lift and turn the circle frequently, as often as every other roll of the pin. Use as little flour as possible, but dust the work surface and the rolling pin as needed to keep the dough from sticking. Transfer to the prepared pan by rolling the dough up onto the rolling pin and laying it over the pan. Ease the dough into the corners of the pan. Patch any tears by pressing the dough together with your fingers. Trim the edges, leaving one inch of the dough standing up above the sides of the pan.

Roll the remaining dough for the top crust. Make it a circle, 1/8-inch thick, a little wider than the pan. Set aside.

Spread the chard filling into the tart shell. Toss the pear slices with the tapioca flour. Arrange them evenly over the filling.

Fold the extended inch of pastry over the filling and pears. Brush this edge with water so the top crust will seal to it. Lay the top crust on top of the filling. Use your fingers to pinch off the excess dough and seal it the top to the bottom.

Cut 6 slits in the crust to allow steam to escape. Place on a large baking sheet and bake 40 to 60 minutes, until the top crust is golden brown. Some of the filling may leak; this is typical. Cool at least one hour.

Remove the fluted pan rim and bottom; you may need to slip a flat knife between the pastry and the pan bottom to release it. Center a 7-inch plate or a cardboard circle on top of the tart as a stencil and sift confectioners’ sugar over the exposed border. Serve at room temperature.


Read Full Post »

I longed for the variety and the weekly surprise of super fresh Ranui CSA produce all winter–how great it was to get John’s call yesterday morning to tell me that Ranui’s CSA is starting up for the season this week—yippee!

This blog, Muffintalk, is 3 years old this summer season. It began as a way to compile the recipes I write for Ranui, to help us all enjoy our produce more. I’d like to say that I add recipes in the winter, chronicling what we are having for dinner, but work and skiing seem to get in the way. As long as we receive our weekly boxes, each Tuesday I will post a couple of recipes featuring the ‘pick’, and I encourage you to Search the archives to find more recipe ideas.

Since lacto-ovo vegetarian is my diet, the recipes include butter and eggs. This is the food Robbie and I cook at home. I work as a pastry chef, though, so enjoy the occasional sweet recipe—like today’s cookies.

Thyme and Lemon Zest Cookies

These cookies are from Peggy Knickerbocker’s Simple Soirees: Seasonal Recipes for Sensational Dinner Parties. They were a perfect light and flaky treat to finish the decadent, five-course brunch we served at Deer Valley last weekend.

The lemon oil bumps up the flavor but you certainly don’t need it to make a tasty cookie. LorAnn lemon oil can be found in Park City at No Place Like Home. Freeze one of the logs for a quick dessert later, tomorrow, this weekend or next month.

½ pound (2 sticks) unsalted butter, room temperature

1 cup confectioners’ sugar, sifted

½ cup sugar (take away 1 tablespoon at higher altitudes)

1 egg, lightly beaten

2 teaspoons vanilla

1 teaspoon of lemon oil, optional

2 ¼ cups all-purpose flour

½ teaspoon baking soda

1 tablespoon finely chopped fresh thyme leaves

1 tablespoon finely chopped lemon zest

In a large bowl, using an electric mixer, cream the butter and sugar until light and fluffy. Add the egg, vanilla and lemon oil, if using, and mix well. Scrape the sides and bottom of the bowl. Sift together the flour and baking soda. Mix into the creamed butter, scraping the bowl again.

Divide the dough into 2 equal portions. On a piece of parchment or waxed paper, pat each portion into a 12-inch log. Use the parchment to roll smooth, even logs, about 1 1/2 inches in diameter. Refrigerate 2 hours or freeze 45 minutes, until firm.

Preheat oven to 325°F. Line a couple of large baking sheets with parchment paper or oil them lightly with canola oil. Slice each log into 1/8-inch rounds and arrange on the baking sheets about 1 inch apart. Bake 10 to 15 minutes, until the cookies are slightly golden brown.

Makes about 100 small cookies.

Read Full Post »

Community Supported Agriculture—CSA. Why does one join a CSA? Is it for incredibly fresh and tasty vegetables? Is it to be part of a movement to support non-industrial farming? Is it choosing to eat foods grown closer to home, to lessen your “footprint” on our planet? Is it an ethical, environmental, political, health or culinary decision or all of the above?

For a whole month last winter I drove around in my Subaru, listening to Michael Pollan’s The Omnivore’s Dilemma, as a book on CD. Every time I started up the engine, Mr. Pollan’s story of food came on where I had left off, reminding me why I participate in a CSA, and why, to me, the CSA concept is so important. The book was first published in 2006, so yes I am late to the pew. But even years ago, when I read a review of the book, I knew he was preaching to my choir. For me, CSA is much more than a weekly box of garden goodies.

Today, Summer Solstice, Ranui CSA members celebrate with our first box of produce. May the harvest stretch well into fall so we can enjoy the fruits of John’s labor longer than we anticipate. And though it may be summer, this week’s veggies speak of spring—like flowering chives.

Flowering Chives

Chives, like onions, leeks and garlic, belong to the lily (Allium) family. Their lovely lavender blossoms are aromatic and edible, with a subtle bite. Separate the blossoms into petals and use them liberally, on top of your salad mix this week and sprinkled on your new potatoes, whether grilled, roasted, pan-sautéed or mashed.

Grilled and Braised Leeks with Chive Blossoms

Grilling adds the smoky flavor,  though is not imperative to grill leeks before braising. But just grilling is not enough: leeks need more cooking time to make them meltingly tender.  Since this vegetarian household came to the grilling scene only last summer, we are way into grilling. In my kitchen, grilled and braised is the perfect marriage for leeks. Think (lily) family and dress up a platter of grilled and braised leeks with pale purple chive flowers.

About 8 young leeks

Extra virgin olive oil, as needed

1 cup vegetable broth

Sea salt and freshly ground pepper

Chive blossom petals

Trim the roots from the leeks. Cut off and discard the upper darker green parts and peel away and discard any tough outer layers. Cut each leek in half lengthwise. Wash them well to remove dirt, checking in between each leaf, especially at the root end. Drain and blot with a towel to remove much of the water moisture.

Preheat the grill to high. Brush the leek halves with olive oil on the cut side. Grill them cut side down, about 5 to 6 minutes or until grill marks appear. Remove to a skillet or foil packet.

To braise stovetop: Heat about a tablespoon of olive oil in a skillet. Add the grilled leek halves and pour the vegetable broth on top. When the broth comes to a simmer, lower the heat and cover the pan. Cook gently about 20 minutes, until the leeks are tender. Remove the cover and cook until most of the broth has evaporated but the leeks are still glossy and moist.

(You can cook the leeks completely using the grill: after giving them nice grill marks and flavor, enclose the leeks in a tight foil packet with about half of the veggie broth. Continue cooking over medium-hot coals, about 20 minutes, until the leeks are soft and well cooked.)

Transfer to a serving plate and sprinkle generously with coarse salt and chive blossom petals.

Serves 2 to 4 as a side dish.

Read Full Post »

Chocolate Snowball, my cookbook of pastries from Deer Valley is now out in paperback and promoting and signings filled my December days off. Here is a link to my Seattle appearance in December. My two younger sisters, a niece and a nephew, a cousin and an aunt  all make their homes in Seattle and came as my fan club in the audience. The Lemon Thumbprint cookies were a hit. And as you see in the video–you can cleverly fill the “thumbprint” depressions with jelly or jam as well.

Deer Valley Lemon Thumbprint Cookies

1-1/2 cups (3 sticks) unsalted Darigold butter, softened

3/4 cup powdered sugar

1 teaspoon vanilla extract

2 cups all-purpose flour

1 cup cornstarch

1/2 teaspoon salt

1 cup walnuts, toasted and finely ground

Lemon Curd (use the recipe in Chocolate Snowball, or your own.)

Beat butter and sugar in mixer until light and creamy; add vanilla and beat to blend. Sift flour, cornstarch and salt into separate mixing bowl; add walnuts.

Add flour/nut mixture to butter mixture and mix just until blended.  Refrigerate dough at least 1 hour. Preheat oven to 325°F. Roll dough into 1-inch balls (or scoop with a #100 ice cream scoop) and place on lightly greased (or spray with non-stick cooking spray, or line with parchment paper) cookie sheets one inch apart. Press down center of each ball with thumb. Bake 18 to 20 minutes or until lightly golden. Remove from oven; place on wire rack to cool.  Fill hole with Lemon Curd once cookies are cool.

Makes about 66 Thumbprint cookies.

A full time job living in the land of excellent skiing doesn’t leave much time for blogging. Wouldn’t you rather go skiing than sit at the computer? It’s not that I haven’t been cooking–there is plenty yummy in our house. Just tonight I made “creamless” cauliflower soup, gingery spiced rice and mung bean stuffed acorn squash and for dessert–a feathery olive oil cake withe sliced vanilla pears. It seems I’d rather cook it that take photo and tell you all about it. A fellow CSA member and neighbor remembers my Minestrone soup and wants the recipe–but have not prioritized to post it.  I do think of you, my readers, and my brain dreams of ideas to post. Currently in my car, as I travel from work to home and back, I am listening to The Omnivore’s Dilemma–yes I am finally reading this important book thanks to recorded books on CD. Did you know that xanthan gum, used in many of our favorite store-bought salad dressings, is likely made from corn? So much to blog–and so little time.

Read Full Post »

I have always said that when I no longer work at Deer Valley I will join Wasatch Mountain Food and Wine Society. I only want to be invited to one banquet—the annual Sunday luncheon created by Deer Valley’s most senior chefs and pastry chefs. The banquets are usually in early June, between seasons for us, and we have the time to perfect our menu ideas; I want to be seated and served because I know the effort, expense and love that goes into each course.

Last Sunday, Shane and Kristine, who in the winter oversee the Fireside Dining kitchen at Empire Canyon Lodge, served a lemon pasta roulade filled with chicken and vegetables, in a bowl of chicken broth sprinkled with chive oil and Hawaiian lava salt oil. They called it Chicken Noodle Soup!

This is Shane’s chive oil recipe with my very simple but sexy lemon pasta in broth. I have an inexpensive hand-cranked stainless steel pasta machine that I bought at a garage sale years ago—and I drag it out of the corner of my pantry when I have the time to flatter my guests with elegant homemade pasta. Truly it is not that time consuming a project—it takes me about an hour to prepare the noodles from dough to finished dish. The food processor mixes and kneads the dough in seconds. While the dough is resting, heat the broth, make the chive oil and set the water to boil.

Lemon Pasta with Chive Oil

The chive oil can garnish soup or salad (of Ranui greens), be basted on grilled meat or fish, and though I am reluctant to say it, dress up a dish of boxed fettuccini.

1 ½-1¾ cup unbleached all purpose flour

3 large eggs

2 teaspoons grated lemon zest

1 teaspoon Real Salt

3 cups flavorful vegetable or chicken broth

½ cup chopped fresh chives

½ cup extra virgin olive oil

1 tablespoon fresh squeezed lemon juice

2 tablespoons chive blossoms or chopped chives, for garnish

Put 1 ½ cups of the flour in the work bowl of a food processor fitted with the steel knife blade. Add the eggs, lemon zest and salt and process until the dough forms a ball. The dough should not be wet—if it is, add the remaining flour, 1 tablespoon at a time and process the dough for about 30 seconds, or until it is smooth. Wrap the dough in plastic and let it rest for 30 minutes.

Chive Oil and Blossoms, Pasta resting

Heat the broth and keep hot on the back burner of the stove. Put the chives and the olive oil in a blender. Whir until the oil is warm, a minute or so. Set aside with a strainer nearby. Bring a large pot of water to a boil. Salt the water generously—Italian cooks say it should be as salty as broth.

Divide the rested pasta dough into eight pieces. Keep them covered with plastic so they don’t dry out. With a pasta machine or by hand, roll out and stretch each piece into a rectangle about 1/16 inch thick, using flour sparingly as needed to keep the dough from sticking to the rollers. Cut the pasta on the noodle setting of the machine or about ¼ inch thick. Separate the strands and let the pasta dry, stretched out on towels or a pasta drying rack.

pasta rolling

noodle cutting

drying lemon pasta

drying lemon pasta

Strain the chives from the oil, discarding the pulp. Add the lemon juice to the broth. Drop the pasta into the boiling salted water and cook it for 30 seconds after the water returns to a boil—fresh pasta cooks very quickly and you want it to be just firm to the bite (al dente).

Drain and divide the pasta into 6 serving bowls. Pour about 1/2 cup of broth over the noodles, drizzle generously with chive oil and garnish with chive blossoms or chives. Serve immediately.

Read Full Post »

Older Posts »